Tableaux CSS
Plusieurs propriétés CSS sont largement utilisées pour styliser les tables HTML. Chacune est décrite ci-dessous.
Dans ce chapitre, nous verrons comment styliser les tableaux, notamment en modifiant les couleurs des en-têtes et des lignes.
Propriétés de style des tableaux
Voici les propriétés CSS utilisées pour styliser un tableau. Les propriétés background-color et color définissent respectivement les couleurs d’arrière-plan et du texte. La propriété border-collapse fusionne les bordures du tableau. La propriété text-align définit l’alignement horizontal du texte. De plus, vous pouvez utiliser height, width et padding pour ajuster la mise en page.
Exemple de style d’un tableau :
Exemple de style de tableaux HTML
<!DOCTYPE html>
<html>
  <head>
    <title>Title of the document</title>
    <style>
      table {
        width: 100%;
        border-collapse: collapse;
      }
      table,
      th,
      td {
        border: 1px solid black;
      }
      thead {
        background-color: #1c87c9;
        color: #ffffff;
      }
      th {
        text-align: center;
        height: 50px;
      }
      tbody tr:nth-child(odd) {
        background: #ffffff;
      }
      tbody tr:nth-child(even) {
        background: #f4f4f4;
      }
    </style>
  </head>
  <body>
    <table>
      <thead>
        <tr>
          <th>Heading</th>
          <th>Heading</th>
        </tr>
      </thead>
      <tbody>
        <tr>
          <td>Some text</td>
          <td>Some text</td>
        </tr>
        <tr>
          <td>Some text</td>
          <td>Some text</td>
        </tr>
        <tr>
          <td>Some text</td>
          <td>Some text</td>
        </tr>
        <tr>
          <td>Some text</td>
          <td>Some text</td>
        </tr>
      </tbody>
    </table>
  </body>
</html>Résultat
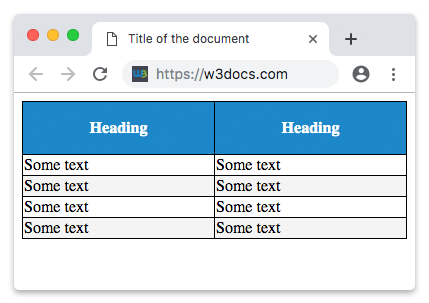
Expliquons le code ci-dessus.
Comme vous pouvez le voir, notre tableau comporte deux sections principales : la section <thead> pour les en-têtes et la section <tbody> pour les lignes de données. Le tableau utilise des bordures noires, appliquées via la propriété border. Vous pouvez utiliser la couleur et le style de bordure de votre choix.
Couleur du tableau
Comme vous le voyez, la partie <thead> de notre tableau est bleue et partout où nous écrivons du texte, il est en blanc. Pour l’arrière-plan bleu, nous utilisons la propriété background-color, et pour le texte blanc, nous utilisons la propriété color. Les autres textes sont écrits en noir.
Fusion des bordures
La propriété border-collapse spécifie si les bordures d’un tableau sont fusionnées en une seule bordure ou séparées.
Largeur et hauteur du tableau
Le tableau possède également les propriétés width et height. Comme vous le voyez, nous utilisons ces propriétés dans notre style. Nous utilisons la propriété width pour l’ensemble du tableau et la propriété height pour les en-têtes. Nous pouvons utiliser ces propriétés avec des pixels et des pourcentages.
Alignement du texte dans le tableau
À propos de l’alignement du texte dans le tableau. Comme vous le savez déjà, nous avons utilisé la propriété text-align pour la position du texte. Dans notre exemple, comme vous le voyez, nous utilisons la propriété text-align pour l’en-tête. Pour cela, nous utilisons "text-align: center". Vous pouvez lire notre chapitre précédent pour savoir comment l’utiliser.
Espacement dans le tableau
Pour contrôler l’espace entre la bordure et le contenu d’un tableau, utilisez la propriété padding sur les éléments <td> et <th> :
Espacement des tableaux HTML
td, th {
  padding: 15px;
}
Alignement horizontal avec la propriété text-align
À l’aide de la propriété CSS text-align, vous pouvez définir l’alignement horizontal du contenu dans <th> ou <td>.
Par défaut, le contenu des éléments <td> est aligné à gauche et le contenu des éléments <th> est aligné au centre. Dans l’exemple ci-dessous, le contenu des éléments <th> et <td> est aligné à droite :
Exemple d’alignement du contenu des éléments <th> et <td> à droite :
Exemple d’alignement du contenu des éléments <th> et <td> à droite
<!DOCTYPE html>
<html>
  <head>
    <title>Title of the document</title>
    <style>
      table,
      td,
      th {
        border: 1px solid black;
      }
      table {
        border-collapse: collapse;
        width: 100%;
      }
      th,
      td {
       text-align: right;
      }
    </style>
  </head>
  <body>
    <h2>Horizontal alignment example</h2>
    <table>
      <thead>
        <tr>
          <th>Firstname</th>
          <th>Lastname</th>
          <th>Money</th>
        </tr>
      </thead>
      <tbody>
        <tr>
          <td>Sherlock</td>
          <td>Holmes</td>
          <td>$200</td>
        </tr>
        <tr>
          <td>John</td>
          <td>Watson</td>
          <td>$250</td>
        </tr>
        <tr>
          <td>Mary</td>
          <td>Whatson</td>
          <td>$500</td>
        </tr>
      </tbody>
    </table>
  </body>
</html>Alignement vertical avec la propriété vertical-align
En utilisant la propriété CSS vertical-align, vous pouvez définir l’alignement vertical du contenu dans <th> ou <td>.
Par défaut, le contenu des éléments <th> et <td> est aligné verticalement au milieu.
Dans l’exemple ci-dessous, le contenu des éléments <td> est aligné verticalement en bas :
Exemple d’alignement vertical du contenu des éléments <td> en bas :
Exemple d’alignement vertical du contenu des éléments <td> en bas :
<!DOCTYPE html>
<html>
  <head>
    <style>
      table,
      td,
      th {
        border: 1px solid black;
      }
      table {
        border-collapse: collapse;
        width: 100%;
      }
      td {
        height: 50px;
        vertical-align: bottom;
        text-align: right;
        padding-right: 10px;
      }
    </style>
  </head>
  <body>
    <h2>Vertical alignment example</h2>
    <table>
      <thead>
        <tr>
          <th>Firstname</th>
          <th>Lastname</th>
          <th>Money</th>
        </tr>
      </thead>
      <tbody>
        <tr>
          <td>Sherlock</td>
          <td>Holmes</td>
          <td>$300</td>
        </tr>
        <tr>
          <td>John</td>
          <td>Watson</td>
          <td>$250</td>
        </tr>
        <tr>
          <td>Mary</td>
          <td>Watson</td>
          <td>$500</td>
        </tr>
      </tbody>
    </table>
  </body>
</html>Séparateurs horizontaux
En ajoutant la propriété CSS border-bottom aux éléments <td> et <th>, vous créerez des séparateurs horizontaux.
Exemple de création de séparateurs horizontaux :
Exemple de création de séparateurs horizontaux :
<!DOCTYPE html>
<html>
  <head>
    <title>Title of the document</title>
    <style>
      table {
        border-collapse: collapse;
        width: 100%;
      }
      th,
      td {
        padding: 10px;
        text-align: left;
        border-bottom: 1px solid #cccccc;
      }
    </style>
  </head>
  <body>
    <h2>Horizontal dividers example</h2>
    <table>
      <thead>
        <tr>
          <th>Firstname</th>
          <th>Lastname</th>
          <th>Money</th>
        </tr>
      </thead>
      <tbody>
        <tr>
          <td>Sherlock</td>
          <td>Holmes</td>
          <td>$200</td>
        </tr>
        <tr>
          <td>John</td>
          <td>Watson</td>
          <td>$350</td>
        </tr>
        <tr>
          <td>Mary</td>
          <td>Watson</td>
          <td>$500</td>
        </tr>
      </tbody>
    </table>
  </body>
</html>Tables au survol
L’utilisation du sélecteur CSS :hover sur l’élément <tr> rendra le tableau réactif au survol.
Exemple de création d’un tableau réactif au survol :
Exemple de création d’un tableau réactif au survol :
<!DOCTYPE html>
<html>
  <head>
    <title>Title of the document</title>
    <style>
      table {
        border-collapse: collapse;
        width: 100%;
      }
      tr {
        background-color: #f5f5f5;
      }
      th,
      td {
        padding: 15px;
        text-align: left;
        border-bottom: 1px solid #ccc;
      }
      tr:hover {
        background-color: #cdcdcd;
      }
    </style>
  </head>
  <body>
    <h2>Hoverable table example</h2>
    <table>
      <thead>
        <tr>
          <th>First Name</th>
          <th>Last Name</th>
          <th>Money</th>
        </tr>
      </thead>
      <tbody>
        <tr>
          <td>Sherlock</td>
          <td>Holmes</td>
          <td>$200</td>
        </tr>
        <tr>
          <td>John</td>
          <td>Watson</td>
          <td>$350</td>
        </tr>
        <tr>
          <td>Mary</td>
          <td>Watson</td>
          <td>$500</td>
        </tr>
      </tbody>
    </table>
  </body>
</html>Tableau zébré
En utilisant le sélecteur nth-child() et en ajoutant la propriété CSS background-color aux lignes de tableau impaires (paires), vous pouvez créer un tableau zébré.
Exemple de création d’un tableau zébré :
Exemple de création d’un tableau zébré :
<!DOCTYPE html>
<html>
  <head>
    <title>Title of the document</title>
    <style>
      table {
        border-collapse: collapse;
        width: 100%;
      }
      th,
      td {
        text-align: left;
        padding: 10px;
      }
      tr:nth-child(even) {
        background-color: #6eeccf;
      }
      tr:nth-child(odd) {
        background-color: #2d7f88;
      }
    </style>
  </head>
  <body>
    <h2>Striped table example</h2>
    <table>
      <thead>
        <tr>
          <th>First name</th>
          <th>Last name</th>
          <th>Points</th>
        </tr>
      </thead>
      <tbody>
        <tr>
          <td>Sherlock</td>
          <td>Holmes</td>
          <td>$250</td>
        </tr>
        <tr>
          <td>John</td>
          <td>Watson</td>
          <td>$350</td>
        </tr>
        <tr>
          <td>Mary</td>
          <td>Watson</td>
          <td>$500</td>
        </tr>
      </tbody>
    </table>
  </body>
</html>Tables responsives
Pour rendre un tableau responsive, enveloppez-le dans un élément conteneur et appliquez overflow-x: auto à ce conteneur.
Exemple de création d’un tableau responsive :
Exemple de création d’un tableau responsive
<!DOCTYPE html>
<html>
  <head>
    <title>Title of the document</title>
    <style>
      div {
        overflow-x: auto;
      }
      table {
        border-collapse: collapse;
        width: 100%;
      }
      th,
      td {
        text-align: left;
        padding: 8px 5px;
      }
      tr:nth-child(even) {
        background-color: #6eeccf;
      }
      tr:nth-child(odd) {
        background-color: #2d7f88;
      }
    </style>
  </head>
  <body>
    <h2>Responsive table example</h2>
    <div>
      <table>
        <thead>
          <tr>
            <th>First Name</th>
            <th>Last Name</th>
            <th>Money</th>
            <th>Money</th>
            <th>Money</th>
            <th>Money</th>
            <th>Money</th>
            <th>Money</th>
            <th>Money</th>
            <th>Money</th>
            <th>Money</th>
            <th>Money</th>
          </tr>
        </thead>
        <tbody>
          <tr>
            <td>Sherlock</td>
            <td>Holmes</td>
            <td>$150</td>
            <td>$150</td>
            <td>$150</td>
            <td>$150</td>
            <td>$150</td>
            <td>$150</td>
            <td>$150</td>
            <td>$150</td>
            <td>$150</td>
            <td>$150</td>
          </tr>
          <tr>
            <td>John</td>
            <td>Watson</td>
            <td>$350</td>
            <td>$350</td>
            <td>$350</td>
            <td>$350</td>
            <td>$350</td>
            <td>$350</td>
            <td>$350</td>
            <td>$350</td>
            <td>$350</td>
            <td>$350</td>
          </tr>
          <tr>
            <td>Mary</td>
            <td>Watson</td>
            <td>$500</td>
            <td>$500</td>
            <td>$500</td>
            <td>$500</td>
            <td>$500</td>
            <td>$500</td>
            <td>$500</td>
            <td>$500</td>
            <td>$500</td>
            <td>$500</td>
          </tr>
        </tbody>
      </table>
    </div>
  </body>
</html>Pratique
Quelles propriétés CSS peuvent être appliquées aux tableaux ?